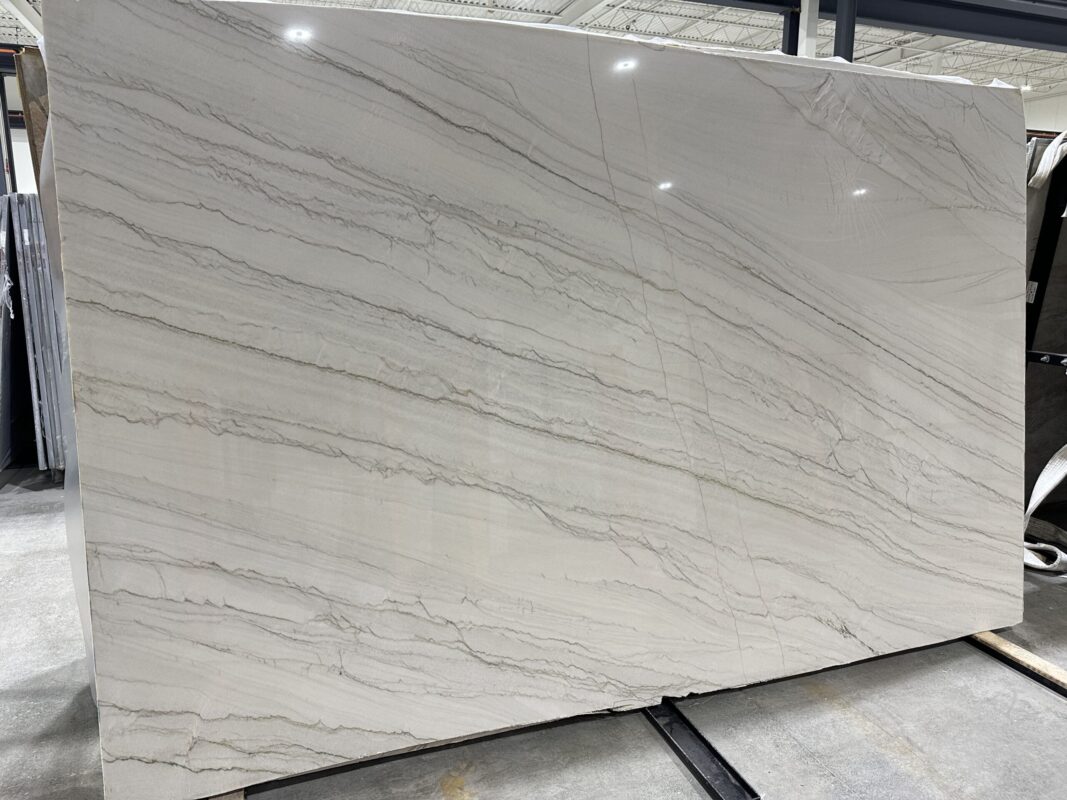
Natural stone is one of the most timeless, luxurious, and durable materials you can install in your home. From the cool elegance of Carrara marble countertops to the earthy warmth of travertine flooring, natural stone brings character and value that no synthetic material can replicate.
But here is the truth most homeowners discover too late: natural stone is not maintenance-free. In fact, many of the things you do every day — from spilling a glass of wine to using the wrong cleaning spray — can permanently damage your stone surfaces.
Section 1: Understanding Your Natural Stone
Before you seal, clean, or maintain any stone surface, you need to know what type of stone you have. Different stone types have very different properties — and what is safe for granite can be destructive to marble.
1.1 The Main Types of Natural Stone in Homes
| Stone Type | Key Characteristics & Care Notes |
| Marble | Soft, calcium-based; highly sensitive to acids (lemon, vinegar). Prone to etching and scratching. Requires regular sealing and pH-neutral cleaners. |
| Granite | Hard, silica-based; highly durable and heat-resistant. Less porous than marble but still benefits from sealing. Resistant to most household acids. |
| Travertine | Porous sedimentary stone with natural voids. Acid-sensitive like marble. Requires sealing and occasional filling of pits and holes. |
| Limestone | Soft, sedimentary; similar sensitivity to marble. Easily etched by acidic substances. Needs consistent sealing. |
| Quartzite | Very hard and durable; often confused with quartz (which is engineered). Naturally resistant but still benefits from sealing. |
| Slate | Dense, layered stone; naturally low porosity. Less sealing required but needs conditioning to prevent flaking. |
1.2 How to Identify Your Stone Type
If you are unsure what stone you have, here are reliable ways to find out:
- Check your original purchase receipts, builder’s specifications, or renovation documents.
- Conduct an acid test: apply a small drop of white vinegar to an inconspicuous area. If it fizzes or leaves a dull spot, your stone is acid-sensitive (marble, limestone, travertine).
- Contact the installer or contractor who fitted the stone.
- Reach out to a professional stone specialist — like the team at Vietcan Stone — for a free consultation.
1.3 Understanding Porosity: Why It Matters
Porosity refers to how many pores (tiny channels) a stone has and how interconnected they are. Highly porous stones absorb liquids much faster, meaning stains set quickly and bacteria can penetrate deeper.
| Porosity Level | Examples & Implication |
| High Porosity | Travertine, limestone, sandstone — absorbs liquids within seconds; seal every 6-12 months |
| Medium Porosity | Marble, some granites — moderate absorption rate; seal every 12-18 months |
| Low Porosity | Quartzite, dense granites, slate — slow absorption; seal every 2-3 years |
Section 2: How to Seal Natural Stone — A Step-by-Step Guide
Sealing is the single most important protective measure you can take for natural stone. A quality sealer penetrates into the pores of the stone and creates a barrier that repels water, oil, and staining agents — giving you time to clean up spills before they become permanent stains.
2.1 Types of Stone Sealers
| Sealer Type | Best For & Notes |
| Penetrating / Impregnating Sealer | Best for most natural stones. Seeps into the pores and cures inside. Does not change the stone’s appearance. Top choice for countertops, floors, and wet areas. |
| Topical / Surface Sealer | Sits on top of the stone creating a film. Can change appearance (gloss or matte). Less durable, may yellow or peel. Better for decorative or low-traffic surfaces. |
| Color-Enhancing Sealer | Deepens and enriches the natural color of the stone while sealing. Great for dark stones, slate, or any stone where you want to enhance the natural beauty. |
2.2 Step-by-Step Sealing Process
| Tools & Materials You Will Need
Penetrating stone sealer (appropriate for your stone type) | Clean lint-free cloths or applicator pad | pH-neutral stone cleaner | Rubber gloves | Painter’s tape (for edges) | Well-ventilated workspace |
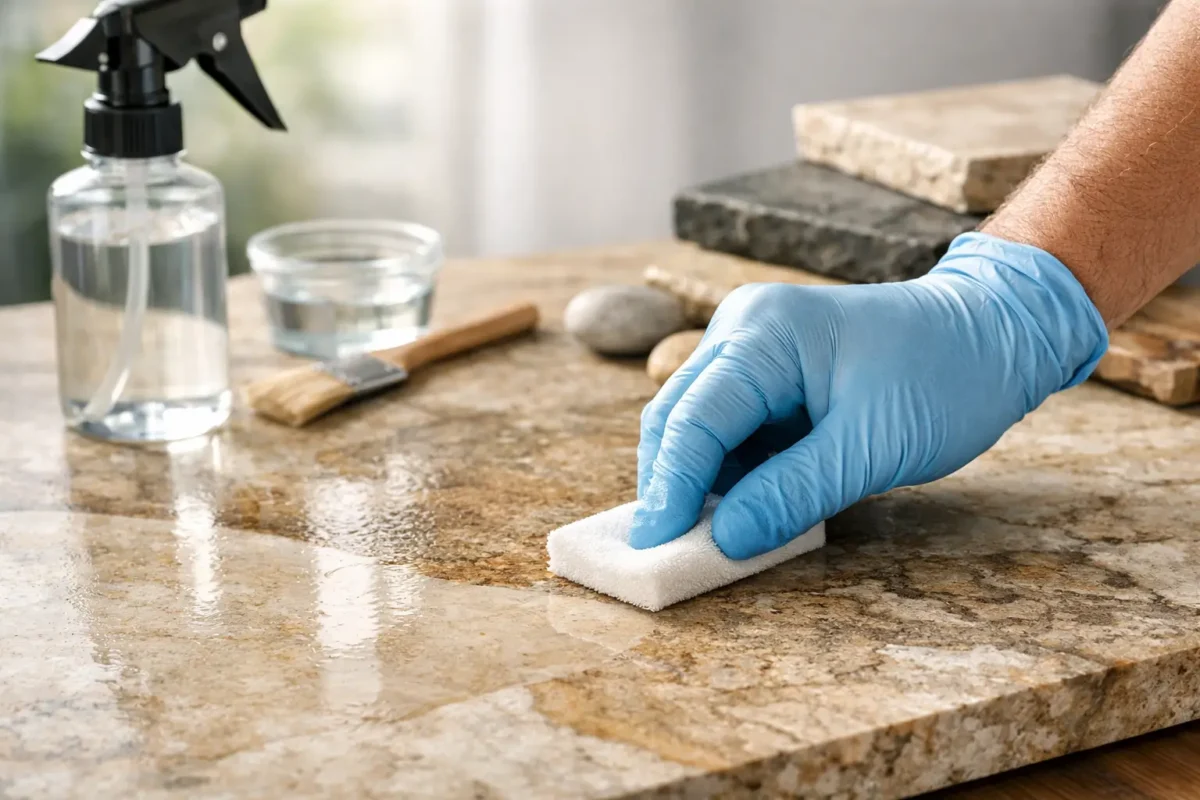
Step 1: Clean the surface thoroughly.
Use a pH-neutral stone cleaner and warm water to remove all dirt, grease, old product residue, and contaminants. Allow the stone to dry completely — this is critical. Applying sealer to a damp stone traps moisture inside and can cause cloudiness, efflorescence, or mold.
Step 2: Test the sealer on a small hidden area.
Every stone reacts differently. Apply a small amount to an inconspicuous spot, allow it to cure, and check for any discoloration or adverse reaction before proceeding with the full surface.
Step 3: Apply the sealer evenly.
Pour a small amount of sealer onto the stone or onto a clean applicator cloth. Work in sections of approximately 3-4 square feet. Apply in a thin, even coat using circular or overlapping strokes, ensuring complete coverage. Avoid pooling or over-application.
Step 4: Allow the sealer to penetrate.
Follow the manufacturer’s instructions — typically 5 to 15 minutes for a penetrating sealer. During this time, the sealer is soaking into the pores of the stone. Do not let it dry completely on the surface.
Step 5: Wipe away all excess sealer.
Before the sealer dries on the surface, buff away all excess with a clean, dry cloth using firm circular motions. Any sealer left sitting on the surface will cure into a hazy, streaky residue that is difficult to remove.
Step 6: Allow full curing time.
Most penetrating sealers require 24-72 hours to fully cure. Avoid water and heavy use during this period. Some products recommend a second coat — apply it within 2-4 hours of the first, following the same process.
| PRO TIP from Vietcan Stone
The ‘water bead test’ is the simplest way to check if your stone needs resealing. Sprinkle a few drops of water on the surface. If the water beads up and sits on top, your sealer is still working. If the water absorbs into the stone and darkens it within a few minutes, it is time to reseal. |
Section 3: How to Clean Natural Stone Safely
Cleaning natural stone is not like cleaning tiles or laminate. The wrong cleaner can etch the stone surface, strip away your sealer, cause discoloration, or leave behind chemical residue. Here is how to do it right.
3.1 Daily Cleaning: The Safe Approach
For everyday cleaning, keep it simple and gentle:
- Use warm water and a small amount of pH-neutral stone cleaner (pH 7). Apply with a soft microfiber cloth or mop.
- Rinse the surface with clean water after cleaning to remove any soap residue, which can dull the stone’s finish over time.
- Dry the surface with a soft cloth rather than leaving it to air dry, especially in hard water areas where mineral deposits can form.
- For floors, use a dust mop or soft-bristle broom for daily dust removal — fine grit and sand act like sandpaper on polished stone surfaces.
3.2 What NOT to Use on Natural Stone
| NEVER USE ON NATURAL STONE | ALWAYS SAFE TO USE |
| ✗ Vinegar, lemon juice, or any acidic cleaner | ✓ pH-neutral stone cleaner (labeled safe for stone) |
| ✗ Bleach or chlorine-based products | ✓ Warm water with mild, diluted dish soap (occasionally) |
| ✗ Ammonia or ammonia-based products | ✓ Hydrogen peroxide (diluted) for light-colored stone stains |
| ✗ Abrasive scrubbing pads or powders | ✓ Soft microfiber cloths and mops |
| ✗ All-purpose spray cleaners (usually acidic) | ✓ Specialty stone-safe cleaners by stone type |
| ✗ Steam cleaners at high pressure (can damage sealer) | ✓ Stone-safe poultice for deep stains |
3.3 How to Remove Common Stone Stains
Even with the best sealer and careful habits, stains happen. The key is to act fast and match your treatment to the type of stain:
| Stain Type | Recommended Removal Method |
| Oil-based (cooking oil, grease, lotion) | Apply a poultice made with baking soda and acetone. Cover with plastic wrap, tape edges, leave 24-48 hours, then wipe clean. |
| Organic (coffee, wine, tea, food) | Mix hydrogen peroxide with a few drops of ammonia (light stones only). Apply, cover, and leave for several hours. |
| Rust stains | Use a commercial rust remover formulated specifically for natural stone. Never use generic rust removers — they are often too acidic. |
| Ink or dye | For dark stones: acetone or lacquer thinner. For light stones: diluted bleach or hydrogen peroxide. Test first. |
| Etch marks (acid damage) | Etch marks are surface damage, not stains. They require professional polishing to remove. Prevention is the best cure. |
| Hard water / mineral deposits | Apply a stone-safe hard water remover. Diluted white vinegar is NOT an option on acid-sensitive stones. |
Section 4: Room-by-Room Maintenance Guide
Different areas of your home subject natural stone to different stresses. Here is how to adapt your care routine by room:
4.1 Kitchen Countertops
The kitchen is the highest-risk environment for natural stone. Heat, acidic food prep, and cooking oils are constant hazards.
- Always use cutting boards — never cut directly on stone, even granite. Over time, cutting scars dull the polish.
- Use trivets or heat pads under hot pots and pans. Even heat-resistant granite can develop thermal shock cracks over years of direct heat exposure.
- Wipe up spills immediately — especially citrus juice, tomato sauce, wine, and vinegar-based dressings.
- Reseal kitchen countertops every 12 months, or whenever the water bead test indicates absorption.
- Apply a small amount of mineral oil to honed (matte) marble countertops periodically to enhance natural luster.
4.2 Bathroom Surfaces
Bathrooms subject stone to constant moisture, soap scum, and hard water. Ventilation is your first line of defense.
- Run bathroom ventilation fans during and after showers to reduce moisture buildup.
- Wipe down shower walls and floor after use to prevent hard water deposits and soap scum.
- Keep stone floors dry — damp stone surfaces in showers are prone to mold growth in grout lines.
- Use only stone-safe soap dispensers and avoid bar soap on marble (it leaves insoluble scum).
- Reseal bathroom stone every 6-12 months due to the high moisture and cleaning frequency.
4.3 Stone Flooring
Natural stone floors must balance beauty with durability. Traffic patterns, grit, and foot traffic cause gradual wear.
- Place entrance mats at all doorways to trap grit and soil before it reaches your stone floors.
- Use felt pads on all furniture legs to prevent scratching and pressure marks.
- Dust mop or vacuum (soft attachment) floors daily in high-traffic areas.
- Wet mop with pH-neutral cleaner weekly. Change mop water frequently to avoid spreading dirty water.
- Avoid wet mopping too frequently — excessive water can eventually penetrate even sealed stone.
4.4 Outdoor Stone Surfaces
Outdoor stone faces UV exposure, freeze-thaw cycles, algae, and environmental pollution — a much tougher environment.
- Use a penetrating sealer rated for exterior use — standard interior sealers are not sufficient.
- Clean exterior stone annually with a stone-safe cleaner formulated for outdoor use.
- Address algae and moss growth immediately with an appropriate biocide that is safe for stone.
- Re-inspect sealant every 12 months for outdoor surfaces, and reseal every 1-2 years.
See More: Kitchen Countertop Trends in Canada: A Complete, Practical Design Guide
Section 5: Long-Term Maintenance Schedule
Consistent, planned maintenance is what separates stone surfaces that look stunning after 20 years from those that deteriorate after 5. Here is a recommended schedule:
| Frequency | Maintenance Task |
| Daily | Dust mop floors; wipe down countertops; dry bathroom surfaces after use |
| Weekly | Damp mop floors with pH-neutral cleaner; clean countertops and vanity tops; check for new stains |
| Monthly | Deep clean grout lines; inspect for chips, cracks, or areas of wear; check edges and transitions |
| Every 6-12 Months | Conduct water bead test; reseal if needed (especially bathrooms and kitchens); clean with professional-grade stone cleaner |
| Annually | Professional deep clean and polishing for high-traffic areas; inspect outdoor stone; assess grout for replacement |
| Every 2-5 Years | Consider professional honing or polishing to restore a dull or scratched surface; evaluate structural condition |
Section 6: Common Mistakes & How to Avoid Them
Over years of working with homeowners, the Vietcan Stone team has seen the same damaging mistakes made repeatedly. Here are the most important ones to avoid:
Mistake 1: Using household cleaners without checking pH.
Most kitchen and bathroom cleaners — including many labeled ‘natural’ or ‘eco-friendly’ — are acidic or alkaline enough to damage stone or strip sealers. Always check that any cleaner is specifically formulated and labeled safe for natural stone.
Mistake 2: Waiting too long after a spill.
Even sealed stone has limits. A sealed marble surface may resist a wine spill for 5-10 minutes — but if you are away from the kitchen for 30 minutes, that spill can penetrate and stain permanently. Respond to spills immediately.
Mistake 3: Skipping resealing.
A common misconception is that once sealed, stone is protected forever. Sealers break down over time, especially in high-use kitchens and bathrooms. Regular resealing is not optional — it is the foundation of long-term stone protection.
Mistake 4: Ignoring grout care.
Even if your stone is in perfect condition, stained or damaged grout lines ruin the aesthetic and can harbor mold and bacteria. Grout should be sealed separately and cleaned regularly.
Mistake 5: Using abrasive tools.
Steel wool, rough scrubbing pads, or stiff brushes will scratch and dull polished stone. Always use soft microfiber cloths and pH-neutral cleaners, even for stubborn stains.
Mistake 6: DIY repair of deep etches or cracks.
Minor chips or etch marks on marble and other soft stones can be made significantly worse by amateur repair attempts. Professional polishing and repair is worth the investment for visible or structural damage.
See More: Top 15 Most Beautiful Stone Countertops for 2026 Granite, Marble, Quartz & Quartzite
Section 7: When to Call a Professional
While much of natural stone maintenance is well within the reach of a careful homeowner, there are situations where professional intervention is not just recommended — it is essential:
- Deep stains that have not responded to home treatment methods after 2-3 attempts.
- Etch marks, especially on polished marble, travertine, or limestone — these require professional honing and polishing equipment.
- Cracks, chips, or structural damage that affect more than the surface layer.
- Widespread dulling or haziness across a large floor or countertop area.
- Efflorescence (white salt deposits rising from within the stone) — this indicates a moisture problem that needs professional diagnosis.
- Grout failure, especially in wet areas where water may be penetrating behind the stone.
- Any outdoor stone that is showing signs of flaking, delamination, or biological growth that does not respond to cleaning.
| The team at Vietcan Stone provides professional assessment, sealing, polishing, restoration, and maintenance services for all types of natural stone. Our technicians are trained to diagnose problems accurately and apply the correct solutions without causing further damage. |
Section 8: Choosing the Right Stone for Your Home
If you are still in the planning or renovation stage, choosing the right stone for the right application will make maintenance significantly easier. Here is guidance on matching stone to location:
| Location / Application | Recommended Stone Types |
| Kitchen Countertops | Granite (highly durable, heat-resistant), Quartzite (natural hardness), Soapstone (unique look, very heat-resistant) |
| Bathroom Vanities | Marble (elegant, manageable with care), Granite, Onyx (statement pieces) |
| Shower Walls & Floors | Marble, Travertine (with thorough sealing), Slate (naturally low-slip) |
| Living / Dining Room Floors | Marble, Travertine, Limestone (all stunning for lower-traffic interior areas) |
| Outdoor Patios & Pool Decks | Granite (durable), Travertine (naturally cool underfoot), Bluestone (excellent for wet areas) |
| Fireplace Surrounds | Marble (classic), Granite (heat-resistant), Slate (rustic, durable) |
Conclusion: Your Stone is an Investment Worth Protecting
Natural stone is one of the few home materials that genuinely appreciates in perceived value over time — but only when it is properly cared for. The difference between stone that looks magnificent after 30 years and stone that looks tired and damaged after 5 is almost entirely down to how it was sealed, cleaned, and maintained.
The principles are not complicated. Know your stone type. Seal it on schedule. Use only pH-neutral, stone-safe cleaners. Act immediately on spills. Dust and dry regularly. And call a professional when a problem is beyond home treatment.
By following the guidance in this complete homeowner’s guide, you are protecting not only the beauty of your home but a significant financial investment. Natural stone, maintained properly, will outlast every other surface in your home — and continue looking spectacular for generations.
Natural stone
Natural stone
Natural stone
Natural stone
Natural stone
Natural stone
Natural stone
Natural stone
Natural stone
Natural stone 


